Box Image Storage
HelpYouSponsor’s default configuration enables you to store images for both donors and sponsorship entities. All uploaded files are automatically resized to 500px, which is ideal for online use and minimizes page load times. However, if you need larger files, we’ve integrated with Box.com to allow you to store full-size images alongside the 500px version in HelpYouSponsor.
Box.com Setup
First, create a box.com account. It must be a paid account to use their 'direct link' functionality.
After verifying your Box.com account, go to developers.box.com and create a “Box Content App” on Box.com.
Click on “Get Started,” then select “Box Content,” and give your app a name (any name you like).

Click “Create Application” and then proceed by clicking on “Configure Application.”
You’ll then see the configuration page. Don’t worry about making any changes here!
Box.com might require you to input a redirect_url parameter. The required redirect URL is:
https://app.helpyousponsor.com/admin/box_response
(If you have a custom HYS URL, adjust the beginning of the URL accordingly.)
Next, find the client_id (also known as API key) and the client_secret fields. Make sure to note them down, as you’ll need them later.

3. The explanation is a bit technical, but you’ll also need to contact Box.com support to set up CORS.
Once you have your client_id (API key), write an email to [email protected].
You’ll need two things:
Your client_id (API key)
Your domain name
Your HelpYouSponsor domain will vary depending on your individual setup.
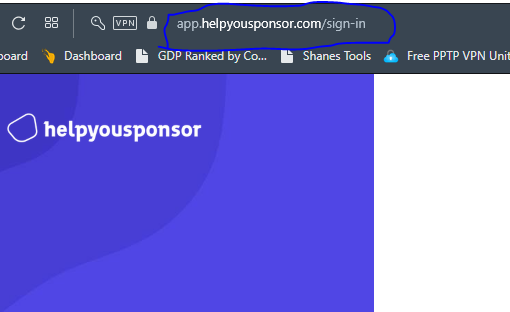
To find your domain, simply log in to your admin login and look at the address bar.

In this example our domain name is "app.helpyousponsor.com"
Your email should look similar to this:
"We are using a box.com integrated application that needs CORS support enabled.
Our client_id (API Key) is : (Insert your client_id here)
Please enable CORS on our app for the following domains:
http:// (insert your domain here)
https:// (insert our domain here)
Thank You!"
It may take a day or two for Box.com support to get back to you to let you know they have activated CORS for your domain.
Then, go to add a file. It will redirect you to box.com's login page, and ask for your to 'grant access' to HelpYouSponsor. Click "grant" and it will put you back on the dashboard.
If there is a redirect_url_mismatch error, make sure to login to HelpYouSponsor with HTTPS:// rather than HTTP://
Now, go to add a file again, and you will see an orange bordered drop-zone area where you can drag files.
HelpYouSponsor Configuration
Now, you will need to login to your HelpYouSponsor admin account.
Click on "Account Settings" on the main menu under Settings and click on the "Integrations" tab.
Click on "View integration" on the "Box" card which will open up a drawer to fill in the required information.

Here fill in the "client_secret" from your box account in the "Private key" field client_id in the "Public key" field and click "Update".
Last updated