> For the complete documentation index, see [llms.txt](https://docs.helpyousponsor.com/guides/llms.txt). Markdown versions of documentation pages are available by appending `.md` to page URLs; this page is available as [Markdown](https://docs.helpyousponsor.com/guides/core-features/sponsorship-management/add-sponsorship.md).

# Add Sponsorship

Use **Add Sponsorship** when you need to create a new donor-recipient sponsorship relationship. The add workflow walks you through two steps — first selecting the donor and recipient, then setting the commitment details before confirming.

## Choose Where to Start

You can start adding a sponsorship from two places.

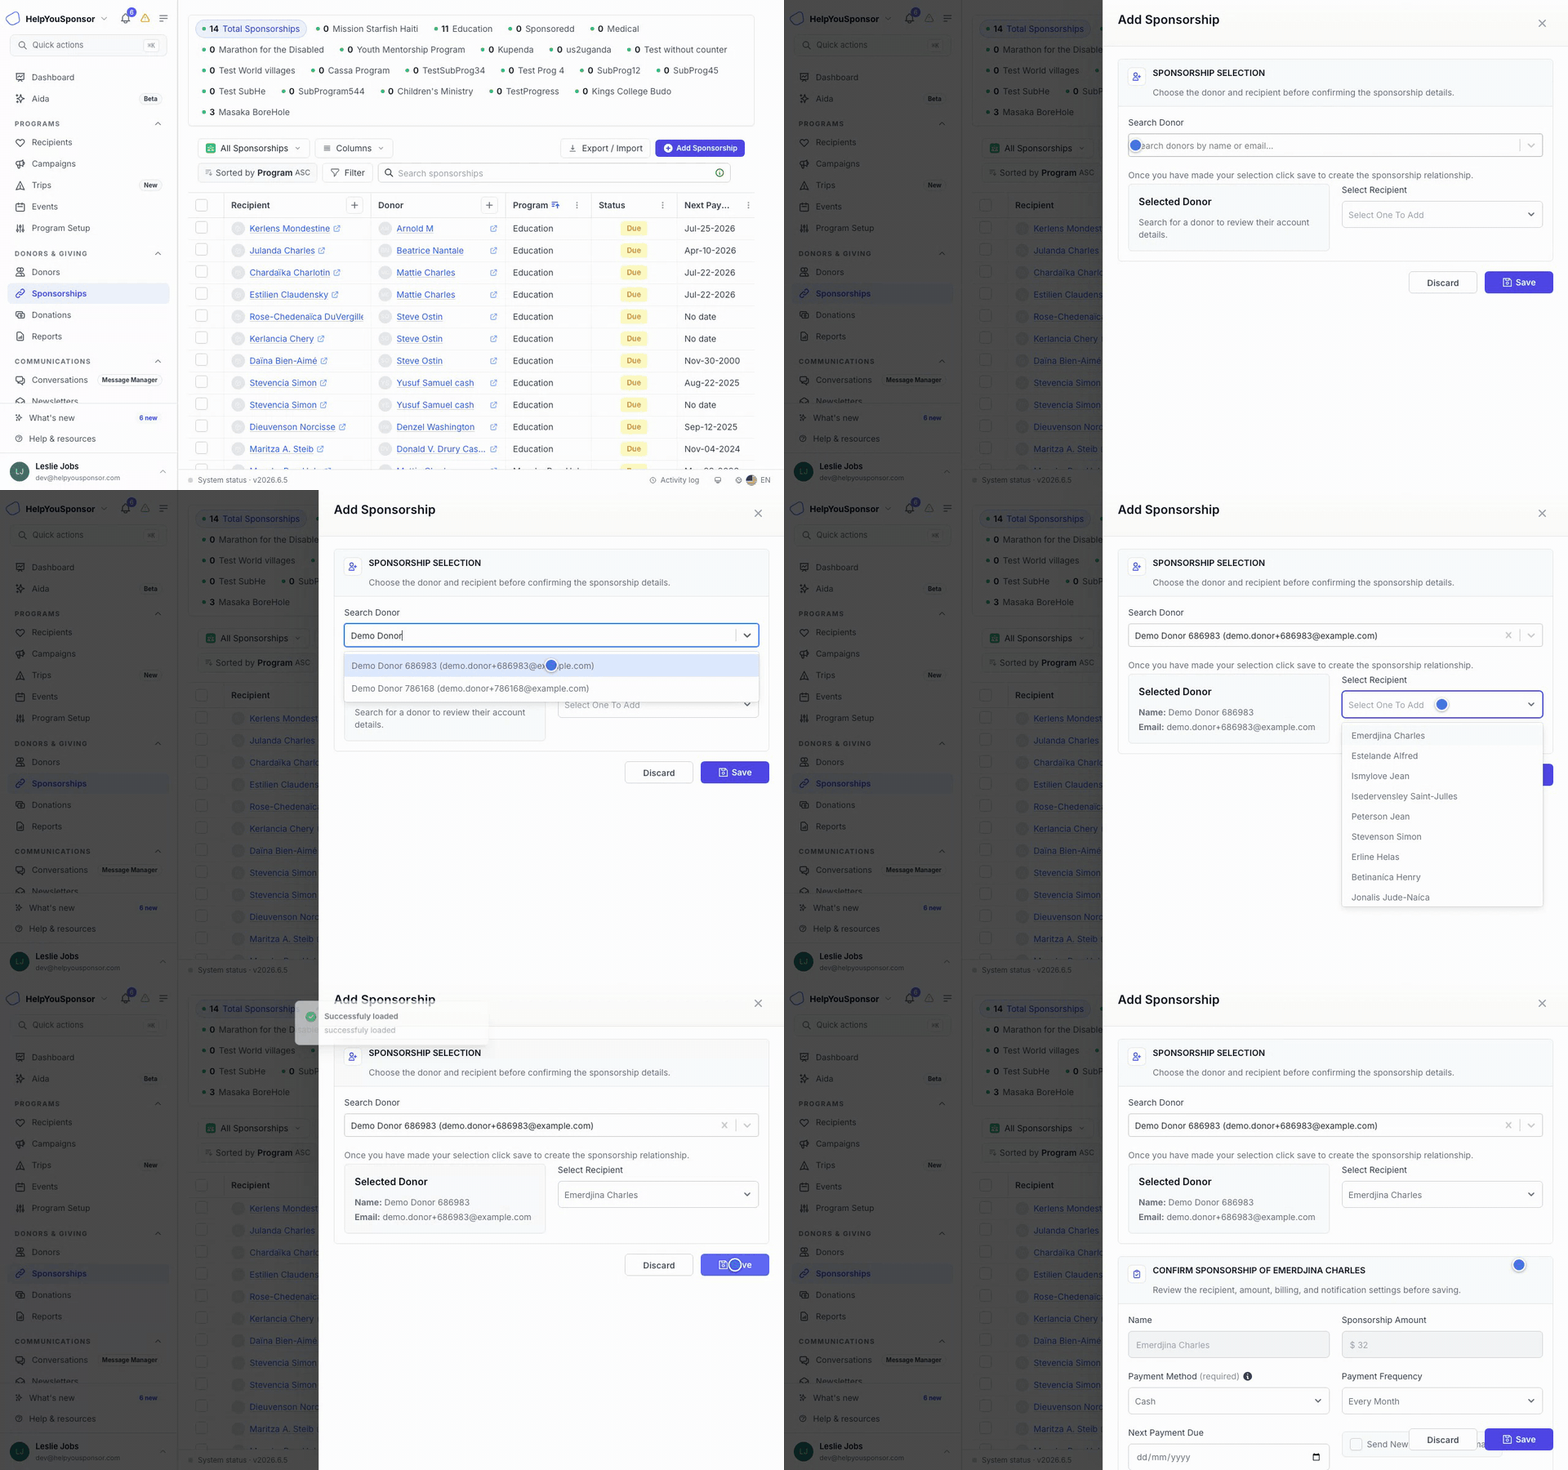
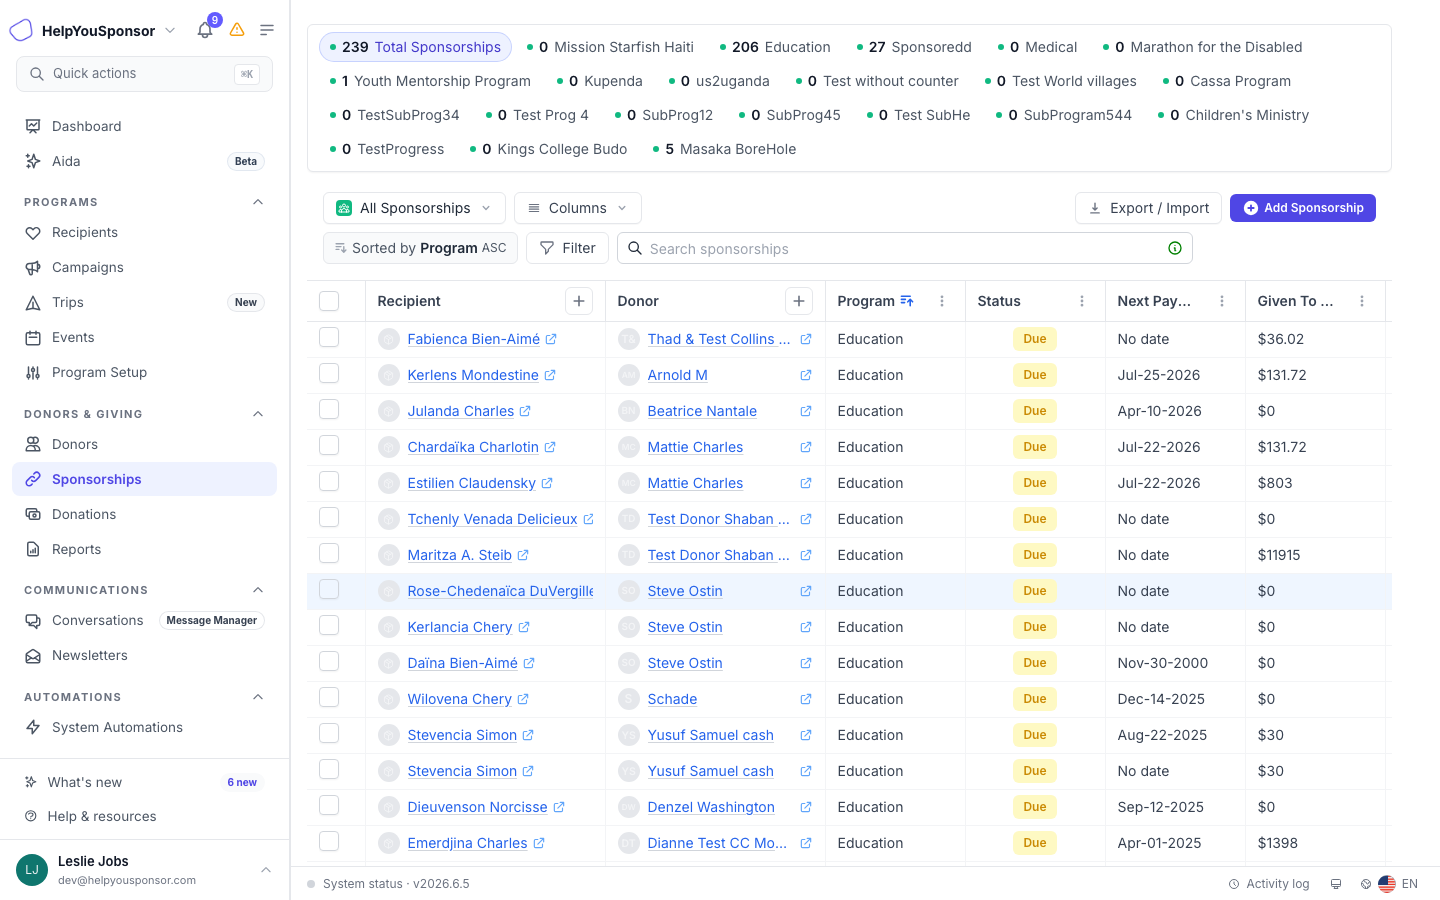
From the **Sponsorships** page, select **Add Sponsorship** in the table toolbar.

<figure><img src="/files/mpHyTzoINFuBnphOjJWH" alt=""><figcaption><p>The Add Sponsorship button opens the sponsorship creation drawer from the Sponsorships table.</p></figcaption></figure>

<figure><img src="/files/HGI6YKKWXlJxIfZZRz7u" alt="Animated walkthrough of adding a sponsorship"><figcaption><p>Walkthrough: creating a sponsorship by selecting a donor and recipient.</p></figcaption></figure>

From a **Donor Profile** page, select **Add sponsorship** from the header actions. This option is only available when the donor status is **Active**.

<figure><img src="/files/dy6cAgs3XVmT7oUKzm8K" alt=""><figcaption><p>The Add sponsorship action on a donor profile header starts the workflow with that donor preselected.</p></figcaption></figure>

You can also use the Quick Actions palette (Cmd+K or Ctrl+K) and select **Create sponsorship**.

## Step 1: Select the Donor and Recipient

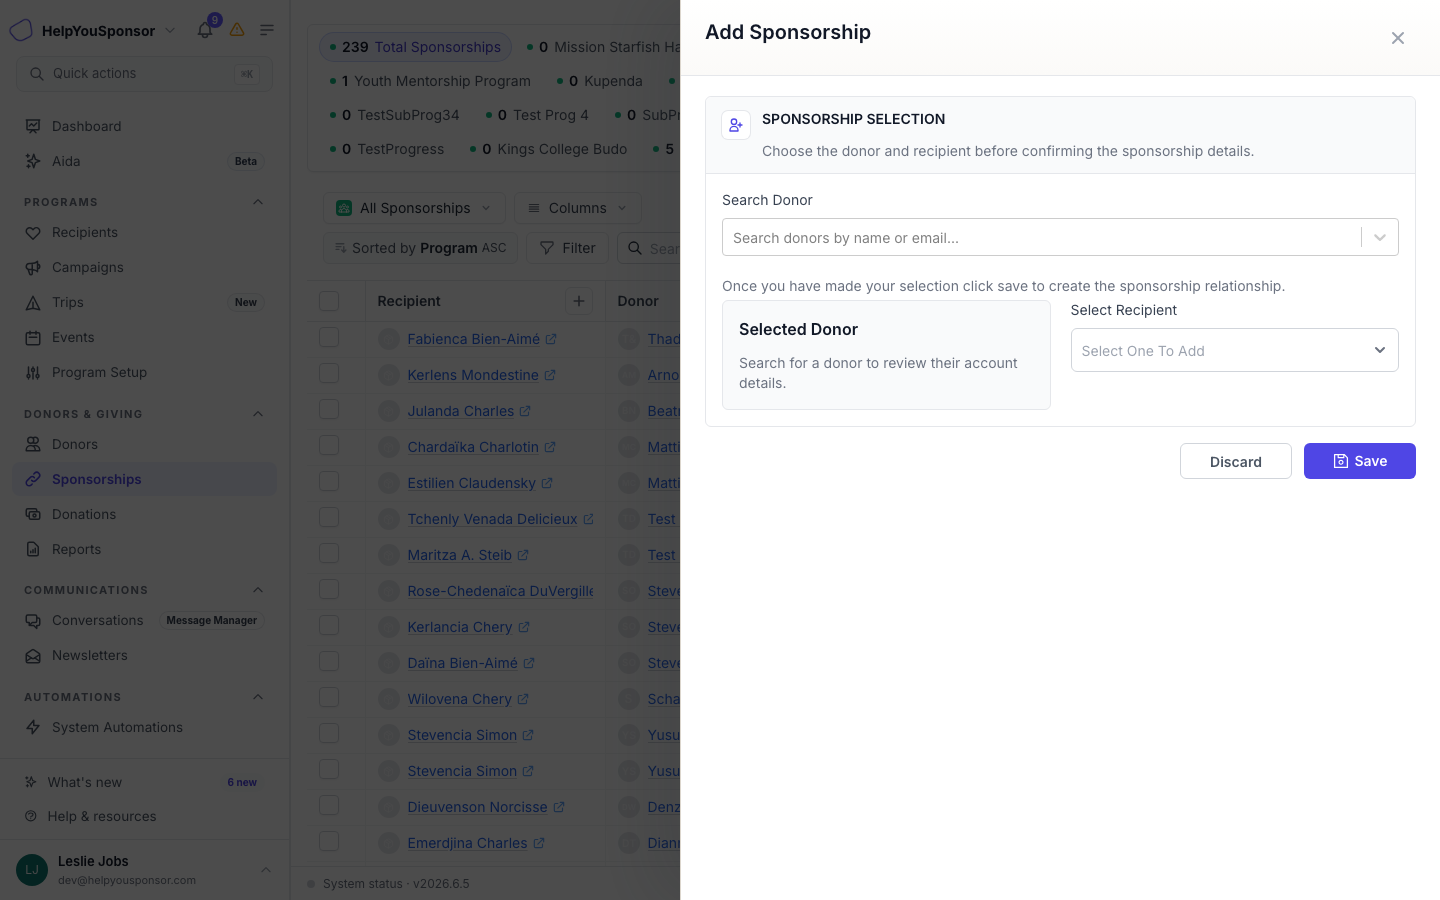
The first step asks you to choose who is sponsoring and who is being sponsored.

1. **Search for a donor.** Start typing a donor name or email. HelpYouSponsor searches your donor records and shows matching results. Select the donor from the list.
2. **Review the donor.** The selected donor name and email appear in the section below the search field so you can confirm you have the right record.
3. **Select a recipient.** Choose the recipient from the dropdown. The list shows recipients available for sponsorship in your programs.
4. Select **Save** to proceed.

<figure><img src="/files/iRphdavOWuqaR5Hi4A2F" alt=""><figcaption><p>Step 1 of the sponsorship drawer: search for a donor by name or email, then select a recipient.</p></figcaption></figure>

> **Note:** When you start from a donor profile page, the donor is already known. Step 1 only asks you to select a recipient.

## Step 2: Set the Sponsorship Details

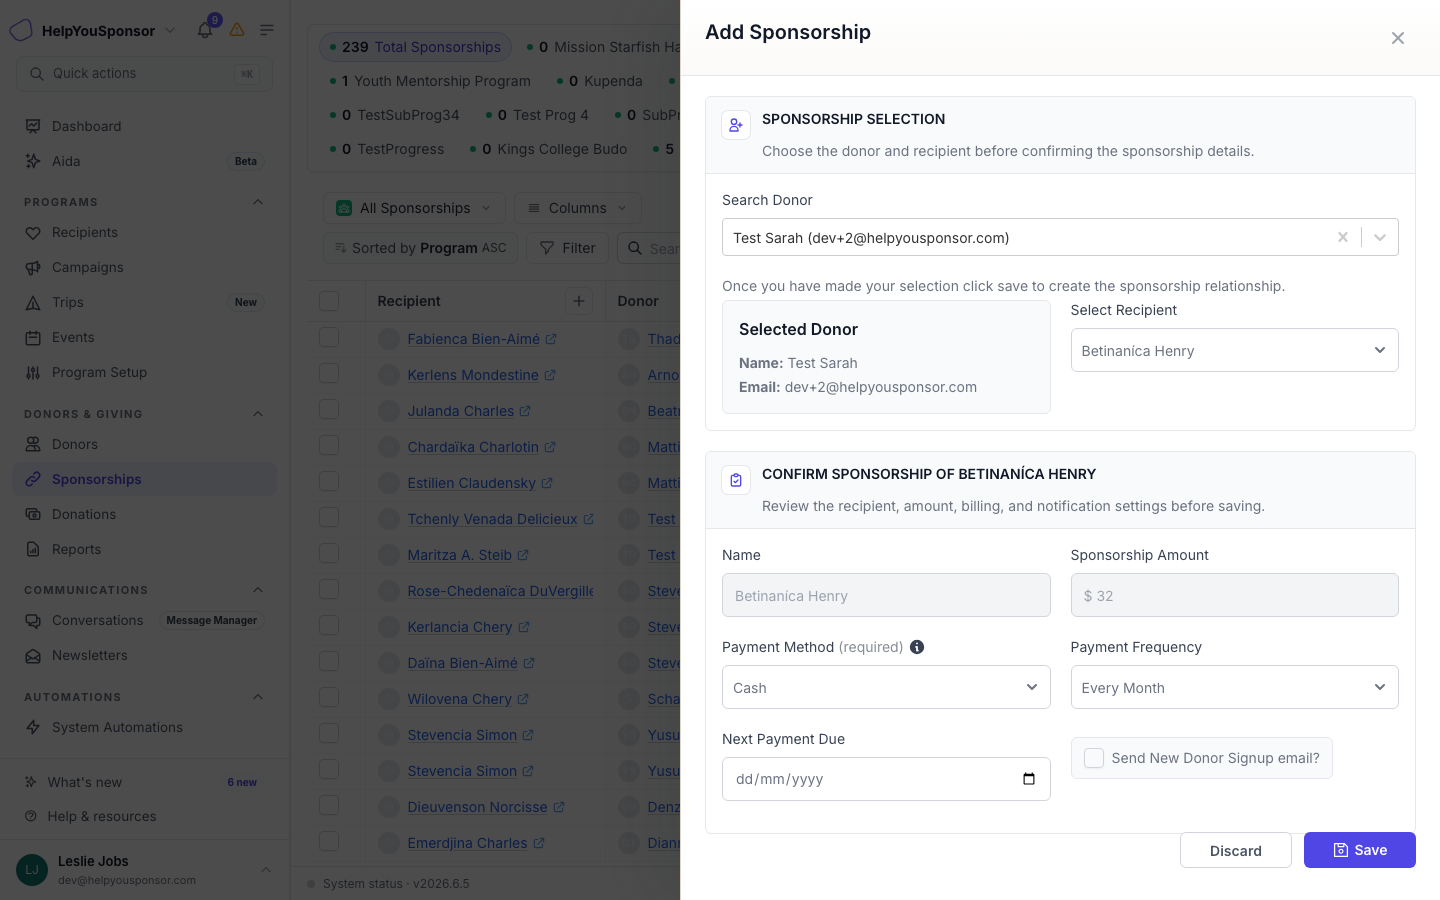
After the donor and recipient are confirmed, HelpYouSponsor loads the commitment fields. The fields you see depend on the program type connected to the selected recipient.

### Choose the Sponsorship Amount

How the amount field works depends on the program type:

* **Funding or Contribution programs** — enter a custom amount or choose from preset amounts when the program defines them. You can also type a custom amount and select **Use custom amount** to add a value that is not in the preset list.
* **Number of Sponsors programs** — the amount may be fixed by the program or editable depending on how the program is configured.
* **Campaign programs** — enter a custom amount or choose from preset amounts.

The amount summary below the field shows what the donor will be charged per period and the monthly equivalent when the frequency is not monthly. Review this summary to make sure the amount is what you intend.

<figure><img src="/files/GI8RQNraeEqGoCTyy7NJ" alt=""><figcaption><p>Step 2 shows the sponsorship amount, payment method, frequency, and next payment date.</p></figcaption></figure>

### Select a Payment Method

Choose how the donor will pay. Available payment methods depend on the donor record and your configured payment gateways:

* **Cash** — record an off-system cash payment.
* **Check** — record a check payment.
* **Wire Transfer** — record a bank wire payment.
* **External Processor** — record a payment processed outside HelpYouSponsor.
* **PayPal** — available when the donor has a PayPal email and a PayPal gateway is configured.
* **Credit Card** — available when the donor has a saved card and a card gateway (Stripe or Flutterwave) is configured.
* **ACH Direct Debit (US Bank Account)** — available from the donor profile workflow when the donor has a saved US bank account.

> **Note:** If a payment method is disabled, hover over the info icon next to the field label to see what the donor record needs.

### Set the Frequency and Next Payment

1. **Payment Frequency** — choose how often payments are made. Options include monthly, quarterly, annually, and other frequencies your programs support.
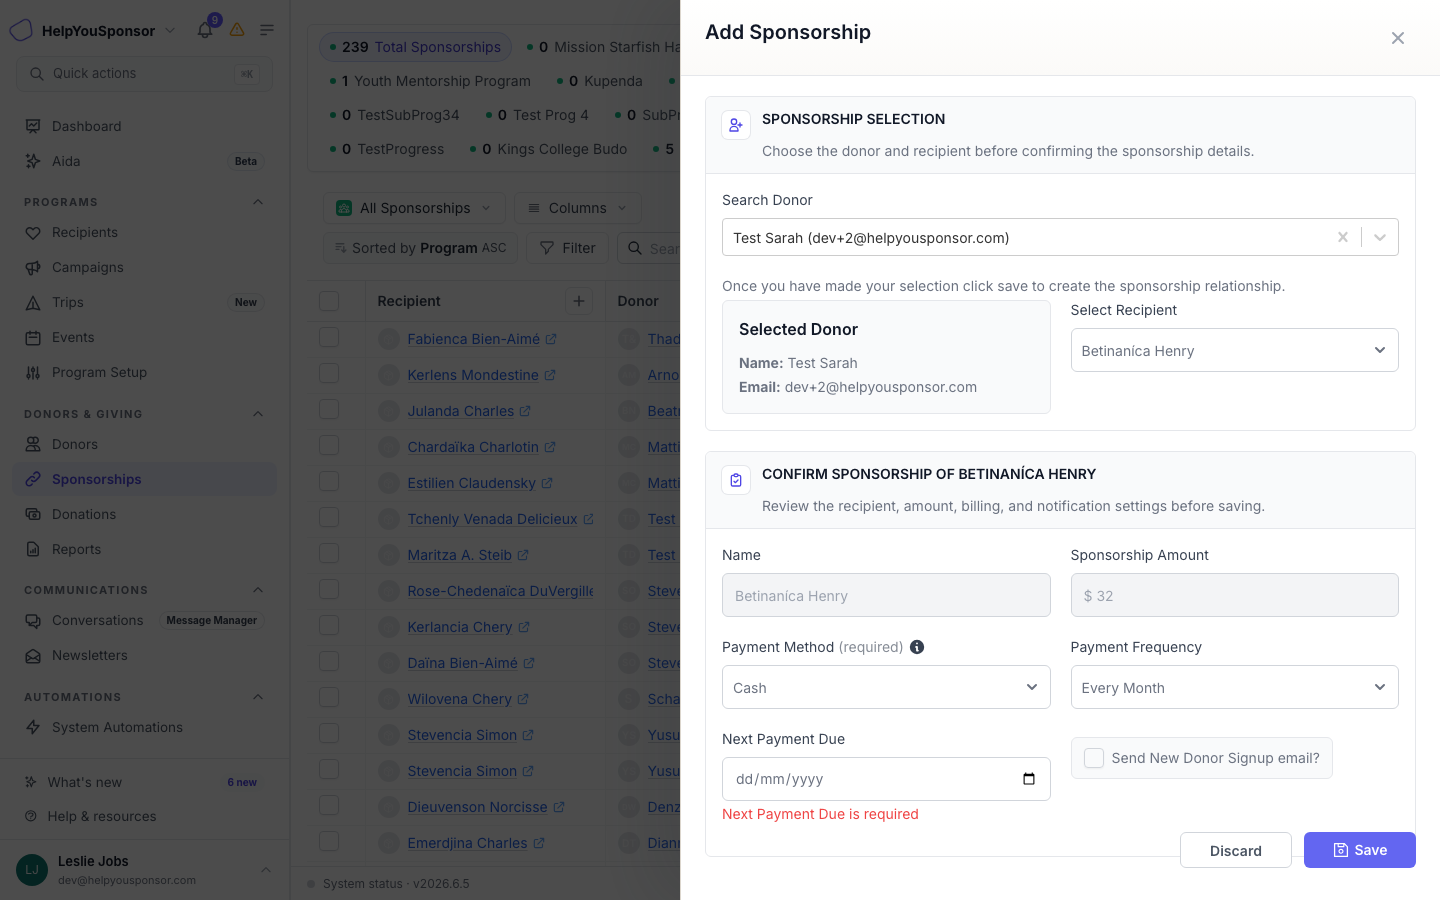
2. **Next Payment Due** — choose the date the first payment is expected. This field is required.

### Optional: Processing Fee

When the program charges a processing fee and the payment method is a credit card, you will see a checkbox to allow the donor to pay the processing fee. The processing percentage configured for the program is shown next to the option.

### Optional: Notification Email

When the program has a new-donor email template configured, you will see an option to **Send New Donor Signup email**. Select this checkbox if you want HelpYouSponsor to send the notification to the donor.

## Review and Confirm

After you select **Save**, HelpYouSponsor shows a confirmation summary. Review the sponsorship details before continuing:

* Donor name
* Recipient name
* Charge per period and monthly equivalent
* Payment frequency
* Next payment date
* Payment method

<figure><img src="/files/yWYHi4RoOuebhXW4cP6j" alt=""><figcaption><p>The confirmation dialog shows the full sponsorship summary before the relationship is created.</p></figcaption></figure>

Select **Create Sponsorship** to complete the sponsorship. The sponsorship appears in the [Sponsorships Table](/guides/core-features/sponsorship-management/sponsorships-table.md) after it is created.

## When a Sponsorship Cannot Be Added

The sponsorship is not created when:

* The donor is archived. The Add Sponsorship option is disabled from the donor profile, and the create step shows a warning that an archived donor cannot be used.
* The amount is less than the minimum required amount.
* The donor or recipient record is not found.
* The recipient is not connected to a program.

## Permissions

Your role controls whether you can add sponsorships. If the **Add Sponsorship** button or the donor profile **Add sponsorship** action is missing, your account may not have the sponsorship management permission. Program access also controls which recipients and programs are available when creating the sponsorship.

## Related Guides

* [Sponsorships Table](/guides/core-features/sponsorship-management/sponsorships-table.md)
* [Sponsorship Management](/guides/core-features/sponsorship-management.md)
* [Donors Table](/guides/core-features/donor-management/donors-table.md)
* [Donor Profile Page](/guides/core-features/donor-management/donor-profile-page.md)
* [Recipients Table](/guides/core-features/recipient-management/recipients-table.md)